EM and Early SS Kit Building Worksheet
Converting a pinball machine from incandescent bulbs to LEDs can seem like a daunting task. There are more lights than you think in those old machines! Below, we’re going to walk you through how to do it, step by step. Consider this Kit Building 101. We’ll keep it as simple as possible.
Don’t worry about taking notes, we’ve got a worksheet that you can print out.
The best part about EMs is that they only use one type of socket: a bayonet (which calls for #44/#47 bulbs). The bulb has a metal base and it twists in and out with a push, locking securely in place.
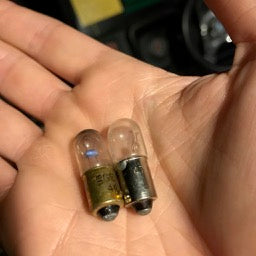
Two #44/#47 bulbs
Inserts & Controlled Playfield Lighting
Inserts are the colored transparent or translucent plastic windows set into the playfield. They come in a variety of colors, and each have a bulb underneath that shines up through them. These are turned on and off to display the status of the game while you play: what to shoot for, how much bonus you have, and more.

Inserts, indicating the current bonus is 1000.
The worksheet has lines for six different colors: red, orange, yellow, green, blue, white. This should cover just about every game, but if you run into a different color, add a new line to the sheet. Count up how many of each there and write it down.
The sheet also has a spot for Credit Indicator. Many people don’t know about this feature, but lots of games have a round, translucent piece of plastic inset into the apron of the game, usually in the lower left corner. This lights up when there are credits available on the machine, and it goes out when the credit reel goes down to zero. If your game has one, mark it down. Otherwise, you can ignore this line.
Here we see a view of the credit indicator on the apron (just above the instruction card).
One last thing: pop bumpers. If your pop bumpers light and un-light during gameplay, write down how many there are in this section of the worksheet. We’d consider that “controlled lighting”, meaning the game controls whether the light is on or off.
Playfield GI
We discussed “controlled” lighting, now let’s talk about “general illumination”, or GI. These are lights that are always on. They usually reside around the edges of the playfield, under the slingshots, and between rollover lanes. You may even find a few near the middle of the playfield, depending on the layout of the game. These stick up through holes in the playfield, and are then covered with plastics containing the game artwork. The bulbs illuminate the plastics and cast light onto the playfield.
Count up the number of GI bulbs in your machine. It’s usually much easier to do on EM machines. Many games have them between the rollover lanes at the top of the playfield - don’t forget these! It’s likely that your game will have somewhere in the neighborhood of 25 general illumination bulbs.
Again, we must mention pop bumpers. If your pop bumpers are always lit, then mark them down here. If they go on and off, then you already counted them in the previous section.
Finally, don’t forget the coin slots in the coin door. These are always on. You’ll likely have 1, 2, or 3.
The Backbox
Carefully remove the blackglass from your machine. The worksheet has three different line items for the backbox.
Controlled. These are the sockets that are walled off from most of the others. They are generally contained within a square, rectangular, or circular area. We call them controlled lights because the game will turn them on or off depending on the state of the game, usually indicating things like: number of players, whose turn it is, ball count, and other information. How many does your game have?


Controlled lights in the backbox
Blinking. These sockets are the same size and shape as any of the others, but they are usually inset into a small crater. Although the base of the bulb is the same size, the glass part of incandescent blinking bulbs are more bulbous and circular than the standard bulbs. Blinking bulbs (which are #455) are totally optional, and completely interchangeable with standard bulbs. There is nothing special about the socket, it’s the bulb itself that does the blinking, with no instruction from the game. Write down the count if your game has any. (Sometimes you will see #455 written in pencil next to a socket.)

General Illumination. All other sockets in the backbox are GI, or general illumination. These bulbs will be on at all times. They light up the artwork on the blackglass of the game, in an attempt to lure quarters from unsuspecting victims. This is the last thing you’ll need to count for the worksheet.
Which bulbs do you get?
This is a matter of personal taste, and great debate, but we’ll tell you what we do.
For general illumination lighting, we use warm white frosted 1SMD bulbs. This includes all sections on the worksheet labeled “GI” in the second column. Count many you’ll need in total.
1SMD bulbs are roughly 1.7x the brightness of incandescent bulbs. This is a great choice for light, but also for longevity if your game will be on most of the time. If you would prefer a dimmer bulb, something closer to the brightness of incandescents, try our SMD Retro.
We use frosted because it’s easier on the eyes, and spreads light better so you don’t get any spotting on the plastics and backglass. Warm White is our favorite because it is closest to the warmth of the original incandescent bulbs. If you want a more blueish, stark white, then choose Cool White. For something in between, Sunlight is excellent.
If you are feeling adventurous, add a few colors...but keep in mind that the game was designed with white lighting. In most cases, colored bulbs will wash out the original artwork.
For controlled lighting, lights that turn on and off as you play, we need to take a moment to explain ghosting. Some controlled sockets in some games may experience a small amount of flickering when the bulb is supposed to be completely off. This is because there is a little bit of voltage at the socket. It wasn’t enough to light up the old incandescent bulbs, but it is enough to cause an LED to illuminate a tiny bit.
The fix for this is a Non-Ghosting bulb. It has a resistor inside that prevents the bulb from illuminating until the voltage is much higher. Your game might need these bulbs, or it might not. Some people won’t notice or be bothered by the brief flicker.
Using Non-Ghosting bulbs for all of the controlled lights in your machine will cost an extra $20-$25, so it’s up to you if that is worth it. Since we don’t want to recommend bulbs that might experience ghosting, we always recommend1SMD non-ghosting bulbs for inserts and other controlled lights. We prefer clear lenses for inserts.
For the backbox, we recommend you use the same white that you’ll be using for the other bulbs in the backbox (we prefer Warm White). For inserts, we recommend color matching. We use:
- Red bulbs for red inserts
- Green bulbs for green inserts
- Blue bulbs for blue inserts
- Warm White for light orange inserts
- Pink, yes pink, bulbs for dark orange inserts
- Sunlight bulbs for yellow inserts
- Cool White bulbs for white inserts (however if you prefer to match the yellowed look of incandescents, use Warm White)
For blinking bulbs, we recommend 1SMD slow blink bulbs. Choose the same color white that you chose for your backbox.